
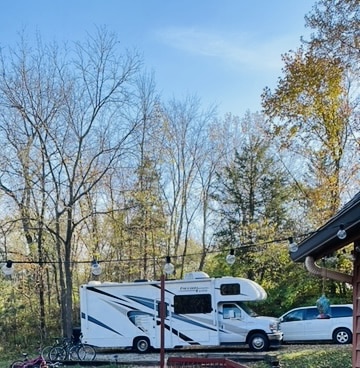
You might have seen it in one of my newsletters, but we recently bought an RV. It was not really in our planning (and budget), but we’ve been dreaming about this adventure for years! I always thought to buy an older model with a good engine. Heck, I was even thinking about transforming a school bus into a “Skoolie”. And suddenly we have a 2021 Freedom Elite parked on our drive way. It’s time to Crafty Dutche-fy this RV. Starting with a bedroom makeover.
Why changing a bedroom in a new RV?
People’s eyes pop out when I tell them I’m redoing the interior of our new RV. The previous owners took really good care of it. They bought it new and traveled a good amount to see family on the east coast, Iowa and Texas. They left us a good amount of unbelievable useful things, like cast iron pans. This is actually funny, because I thought:” Why would someone bring these super heavy pans on a RV trip?”
You want things to be as light as possible, right? But as I was researching recipes to making on a camping trip on an open fire, these cast iron pans are just THE thing to have!
And they did not ONLY leave us the pans, but flash lights, tools, utensils, sleeping bags and the craziest thing they did was putting solar panels on the RV as well! I got super excited! Now I really want to travel around, see and explore more in the US (and Canada), cook and relax and do this all with our family or just the two of us.
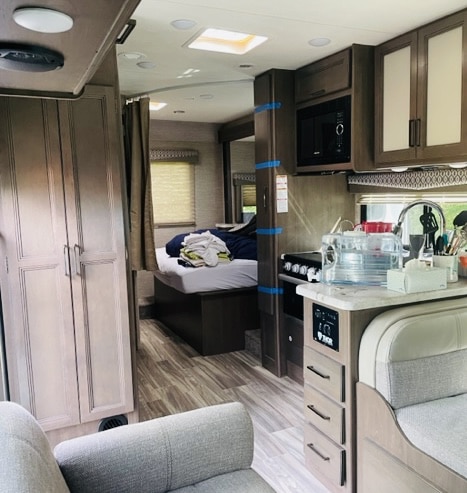
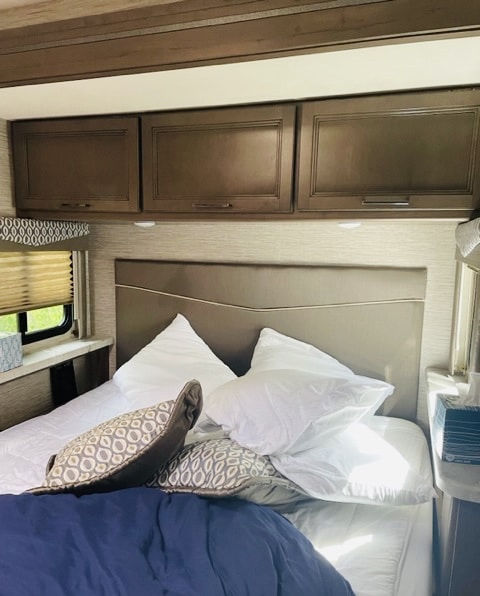
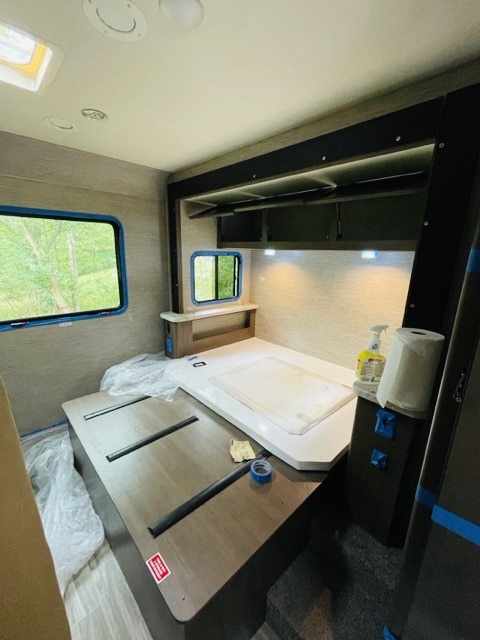
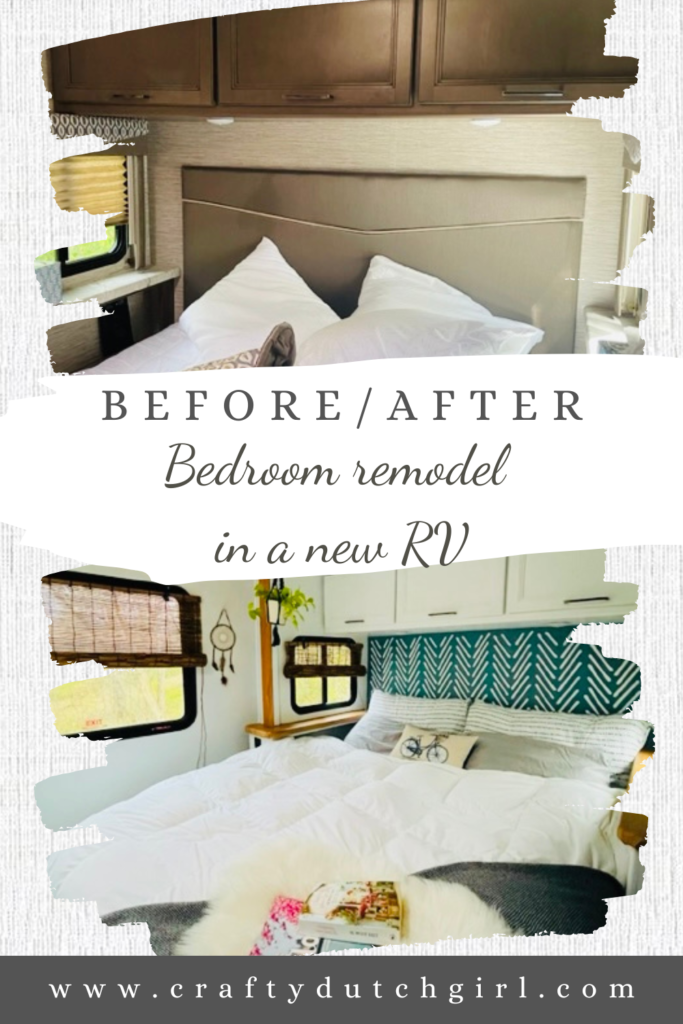
The inside of the RV was not outdated at all, but darker wooden cabinets and doors and grey/beige walls. All very clean and nice, but not really me….uh I mean us!
Ideas for a new interior.
As you can see the RV’s these days come in a darker interior. I would like to use brighter colors for the walls to make the space bigger. This can sometimes look too bright and cool, so a fun contrasting color and warm wood tones hopefully will make it more cozy!
I was thinking to use a boho/shabby chic/country kind of style. We still have children and teenagers, so a totally white interior wouldn’t work for us. I think to start with the bedroom, just to see how hard (or easy) it is to paint the interior, RV cabinets etc. I hope it was going to be at least rewarding…..and to finish the rest of the RV.
1. Cleaning the bedroom out
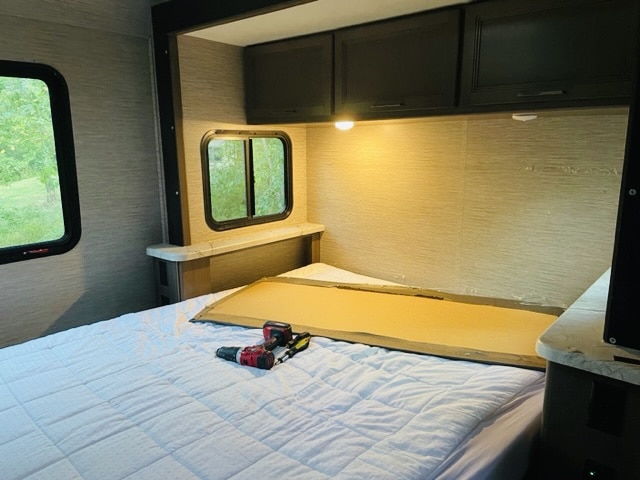
First I removed the mattress, the blinds and the head board. I felt actually a little bad to remove the blinds, because they were easy to use.
Second, I cleaned the surfaces with “Krudkutter” and sanded the wall and the cabinets above the bed lightly. Then I taped the surfaces off with painters tape.
2. Painting the bedroom
Time to paint! For the first layer I used a maximum adhesive primer. After some research, I found out that it takes a few layers of paint RV walls and it’s important to start with a good primer to avoid lots of paint layers. “Bonds” maximum adhesive primer from Zinsser is a great one. After that You can use any kind of paint. I used an off white for the 2 layers over the primer.
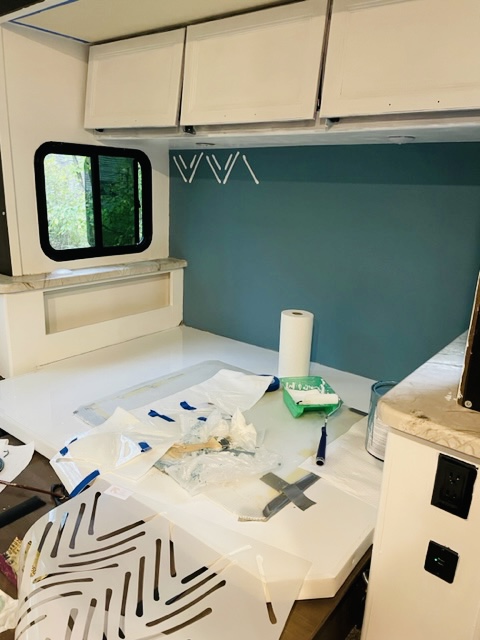
The same technique I used for the cabinets. I removed the hardware before I painted the cabinets (I liked the ones that were on the cabinets already, so I kept them). It was looking a lot better. The room seemed bigger.
3. Headboard makeover with a stencil
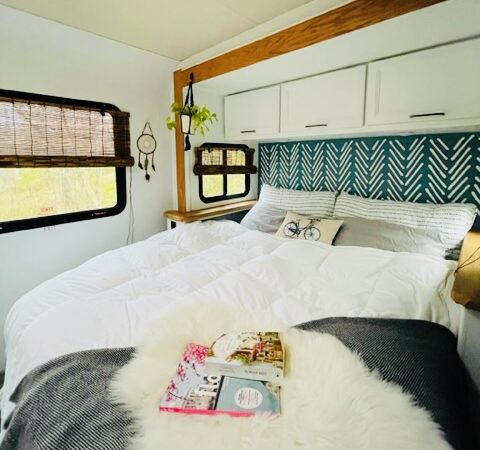
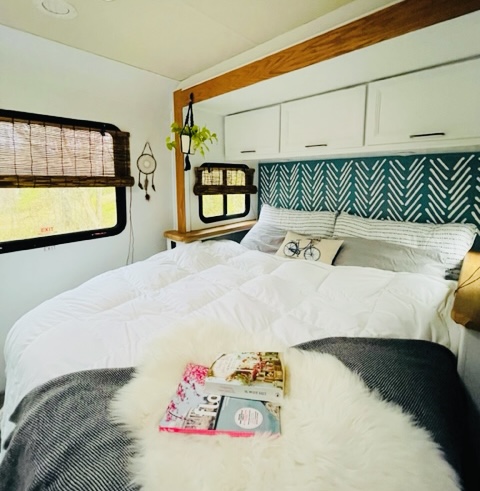
The headboard was just a piece of really thin plywood, wrapped in fabric. It was easy to take it out. I painted the wall behind the bed a “Smoked Turquoise”. It was starting to look like a fun little area.
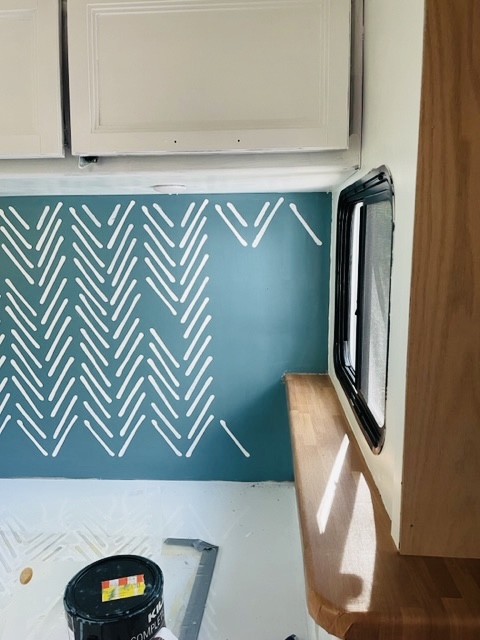
For the stenciling I used the same off-white paint from the walls and a paint stroke herring bone stencil. It was sometimes a little finicky to keep it clean. I haven’t figured it out to stencil on a vertical surface without having drips. I only taped the stencil to the wall on the corners only. Still paint crept down in between the stencil and the wall. Any ideas?
I decided to just touch it up with the turquoise again as soon as the white paint was dry.
4. Add warm and cozy accents.
The trim around the slid out was also a dark brown piece I didn’t like that much. It was easy to take off, because it just had a few staples in them. I used 3/8 by 6 inch thin piece of wood. I found the size I needed at Menards. They might come in 6 feet boards. After that, I sanded them a little and nailed them in place. I used American Walnut from Rustoleum to stain the wood.
On the wall across the bed is a cut out frame to place a television. I added a wooden frame and stained it with the American Walnut also.
As for the window covers I ordered very light weight bamboo roll up blinds. I love them. But at our first trip after I updated the bedroom, we noticed that the blinds are see through. I will add a piece of either denim or burlap/canvas fabric to the back of the bamboo blinds. Should be an easy fix.
My first idea for the blinds were tight woven canvas where I would stencil something on them. They could be rolled up and tightened to the top of the window frame with leather straps. But my husband said it would be too much work to roll the up and down each morning and evening. It would look a little like this.
I made a pillow case with a print on canvas, so it would’ve been something like that.
The little window sills looked like marble, which I didn’t like, so I ordered vinyl wrap in a wooden grain design.
One of the last things I added was a hanging plant with a macrame holder (we made this at our Craft Party). Of course I won’t have it up when we drive, but I think it is nice (and healthy) to have a plant in the RV. And the last thing was a dream catcher. I didn’t make this particular one, even though we made super cute dream catchers with doilies at our Craft Party as well.
So here is the end result of our bedroom in our NEW RV!

Hello everyone,
Welcome to my Crafty Dutch Girl blog! Grab a cup of “koffie” and browse through fun blog posts about our Dutch family expat life in the USA, Dutch history, Dutch recipes, Dutch things to do in the USA and all kinds of crafts and activities. Don’t forget to connect with me for new ideas! “Groetjes en tot ziens”.