Valentine’s Day is one of those Holiday’s that are typical American. Slowly they’re making their way over to the Netherlands and other countries. I remember getting a heart shaped Valentine’s Card in high school from an anonymous person. I still don’t know who it was. Living in the USA with 3 children, made me be more aware what Valentine’s Day really is about. One of the things we do every year are making sweet crafts for friends. Below you’ll find 9 Sweet Valentine’s Day Crafts for kids.
Crafty Dutch Girl is Reader-Supported. When you buy through links on our site, we may earn an affiliate commission. Learn more.
Handmade crafts or store bought gifts?
Parents are juggling with time, energy and money these days. We are working long days, taking care of kids, get food on the table on time and try to save money along the way. We don’t have time to sit down with our kids to do craft? Do we?
When J, our oldest went to Kindergarten I realized, not all kids make sweet Valentine’s Day gifts for their friends. J brought little cards with a lot of sweets back home from school. What is the idea of receiving cards and gifts on Valentine’s Day? Talking to my own kids, they were bummed when someone didn’t get them anything for Valentine’s Day. It was not so much about the lolly pop or heart shape chocolate, but they liked seeing the hand written names on the cards. Most of the years of receiving cards, the kids read every single card and an “Aaawwww!” followed.
I totally understand if it is easier for parents to go quickly to the store and buy cards, sweets or a gift for everyone in the classroom.
I, personally think there are important lessons to be learned on the receiver, but also on the givers end.
1. Making decisions

Before we started to make 10 or 20 cards or gifts, I showed the kids 3 crafts they could choose from (otherwise they kept scrolling on Pinterest). When they got older, they could choose their craft (with help from Pinterest). Sometimes they already knew what to make.
Make decisions about colors, what to do first, when to work on it (in the weekend or after school).
2. Concentration and patience.
Having kids on the electronic devices more than ever these days, it is showing the effects on daily situations. I noticed, doing crafts with kids nowadays is different than a few years ago. Kids receive instant gratification online. They push a button and something happens. With crafts more concentration and patience is needed. Glue and paint dries longer. Kids need to wait for something to dry and then move on.
Kids will get bored or frustrated quickly and don’t know what to do next. There are things that kids can do in the meantime.
3. Fine Motor Skills
I definitely see this with our son. He is super fast navigating video games, but has a hard time cutting over a line, coloring within lines etc. This results in having trouble pouring milk into a glass or writing for school.
4. Proud of the result.
On Valentine’s Day when we wrap up the crafts, every card is signed and the gifts are in a bag, I can see my kids’ excited faces. Proud and eager to give their friends their cards or gifts that day at school. They are proud they can give something they made all by themselves.
I’d like the give them these things as a different learning part of growing up. For parents this can be overwhelming. I’d like to give you some craft examples and with these, also some steps how to prepare yourself and your kids to make this as easy as possible.
- As soon as you find out what your child would like to make for their friends, find out how many friends there are and don’t forget the teacher(s). You might receive a list with names of kids.
- Get your materials ready. Do you need to buy things or are you using recyclable materials?
- Tell your child to tell you when they need help. Luckily we have small classes, but kids probably need help when they are in a class with more than 20 or 30 kids.
- Have an example ready or show them step by step what needs to be done. Help along the way. Encourage them along the way. It doesn’t have to be ready in one day. Take the time, otherwise kids (and you at some point) will get frustrated. I normally take 30 minutes each time, and then for about a week (depends on the card or gift).
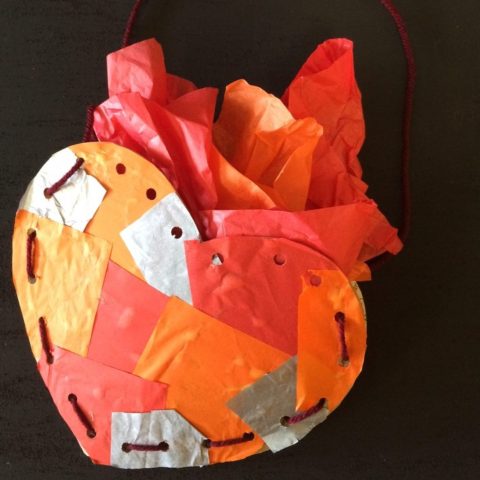
A Heart Pocket
Ages 4 and up
Materials
Cardboard, like cereal boxes
Tissue paper
Glue
Hole Punch
Yarn
Scissors
How to make it?
Cut two hearts out of the cardboard. Punch holes with the hole punch around both hearts, except for the top part of the hearts. This will be the part where you can put present in. Decorate one side of the hearts with pieces of tissue paper or you can use any other things to decorate, like felted flowers, ribbons or beads.
Weave a piece of yarn through the holes. Make sure the hearts are lined up and the decorated sides of the hearts are facing out. You can fill the heart pocket with tissues and a present.
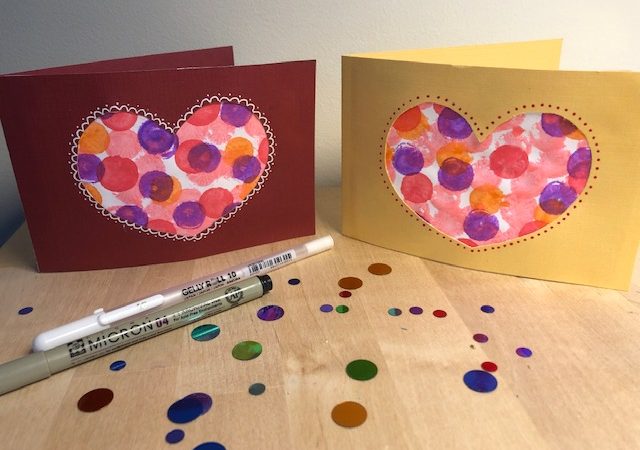
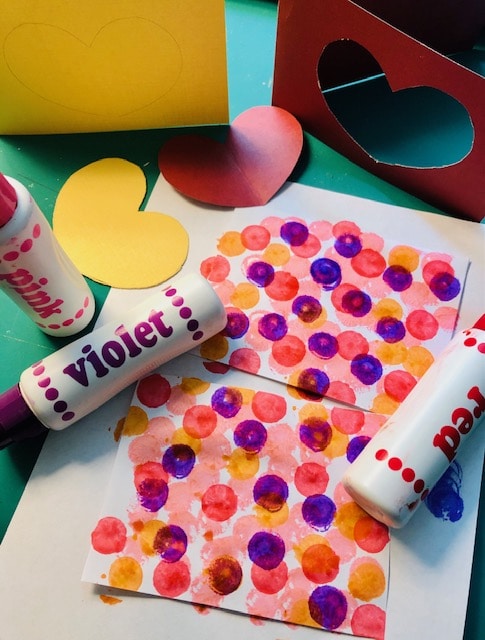
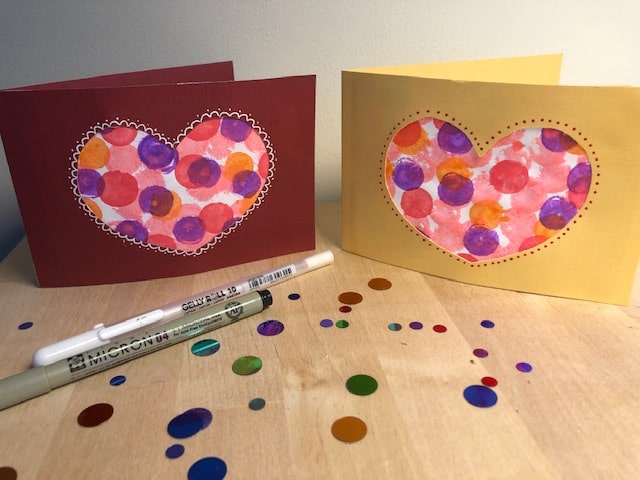
Stamped Heart Cards
Ages 3 and up
Card stock and regular paper
Round sponge stamps or Do-a-Dot Art markers
Paint (watercolor, tempera or acrylic is all good) Not needed if you have the Do-a-Dot Art Markers.
Scissors
Markers
On the regular white paper, make all kids of circles by using the stamps and paint or Do-a-dot markers. Let dry. Fold cards and cut out a heart out of the front of the card. When the paint is dry, cut a bigger heart out of the stamped paper and glue the bigger heart on the inside of the card. Write something sweet inside the card. Your toddler can help stamping and you can cut out the hearts.
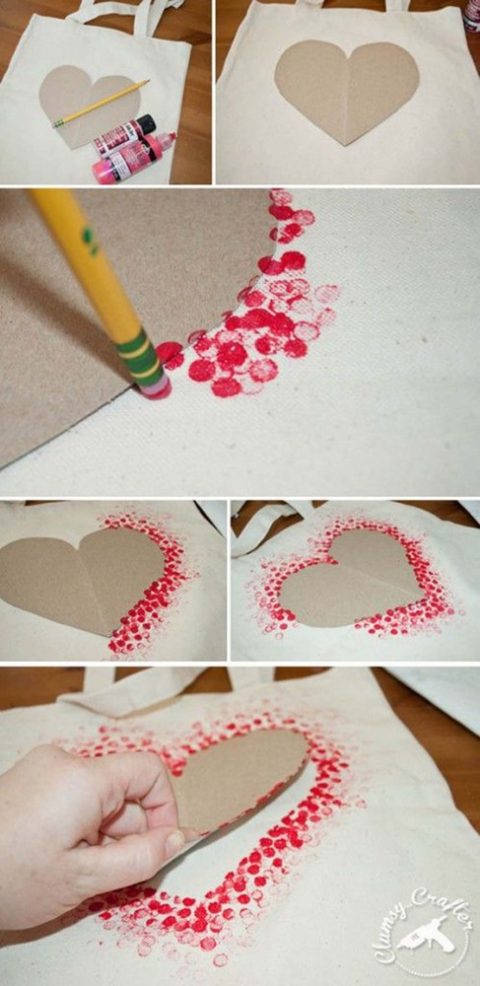
Stamped Heart Bag
Ages 5 and up
Canvas Bag
Fabric Paint
Heart Template (Cut a heart shape out of cardboard)
Pencil with eraser
For this craft you need to slide a piece of cardboard inside the bag, so the paint will not show on the back panel. Use the eraser of the pencil as the stamp. Position the heart template on the bag and stamp all around with the fabric paint. Carefully lift the template off the bag when ready and let dry. Read the instructions when you can wash it and if you have to iron it.
Heart surprise in Box
Ages 7 and up

Materials
Scrapbook paper
Scissors
Glue
Things to decorate like stickers, sequences, glitter etc.
Something fun to put inside the box.
Print out the template above on cardstock. Cut out the template. Use this template to make the amount of boxes you need on all kinds of different scrapbook paper. Cut out each box and fold on the lines (the dotted ones). Assemble the box and decorate! You can put a cute note in the box or use the heart flaps to write on. Do you have a surprise? Then put it inside!
Valentines Day Owls
Ages 7 and up

Materials
Toilet rolls, construction paper, scrapbook paper.
Scissors
Glue
Eyes
Roll and glue the toilet paper rolls in construction paper. Fold the top part in to make the ears. Cut out white hearts and write something sweet on them and glue one on the front (the belly). Make a beak out of construction paper and glue the beak and eyes on the owl. Cut out leaf shapes out of scrapbook paper for the wings. Optional: Stuff the owl with a small gift or candy.
Pompom Valentines Day Monsters
Age 5 and up
Yarn
Scissors
Eyes
Pipe cleaners
Felt
Here is a tutorial if you have a pompom maker. If you don’t have one, here are different methods to make pompoms:
Toilet paper rolls (this video also shows how to cut it into a perfect pompom)
Glue the eyes on the pompom. Make 2 swirly antennae with pipe cleaners (wrap them around your pinky finger) and glue them on your monster. Cut a heart out of felt. These are the feet. Optional: make heart labels for your name and you can even glue a round magnet on the bottom of the monsters feet, so your friends can hang your cute little monster on the refrigerator door;)
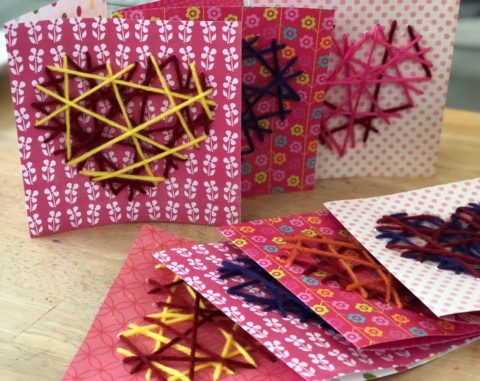
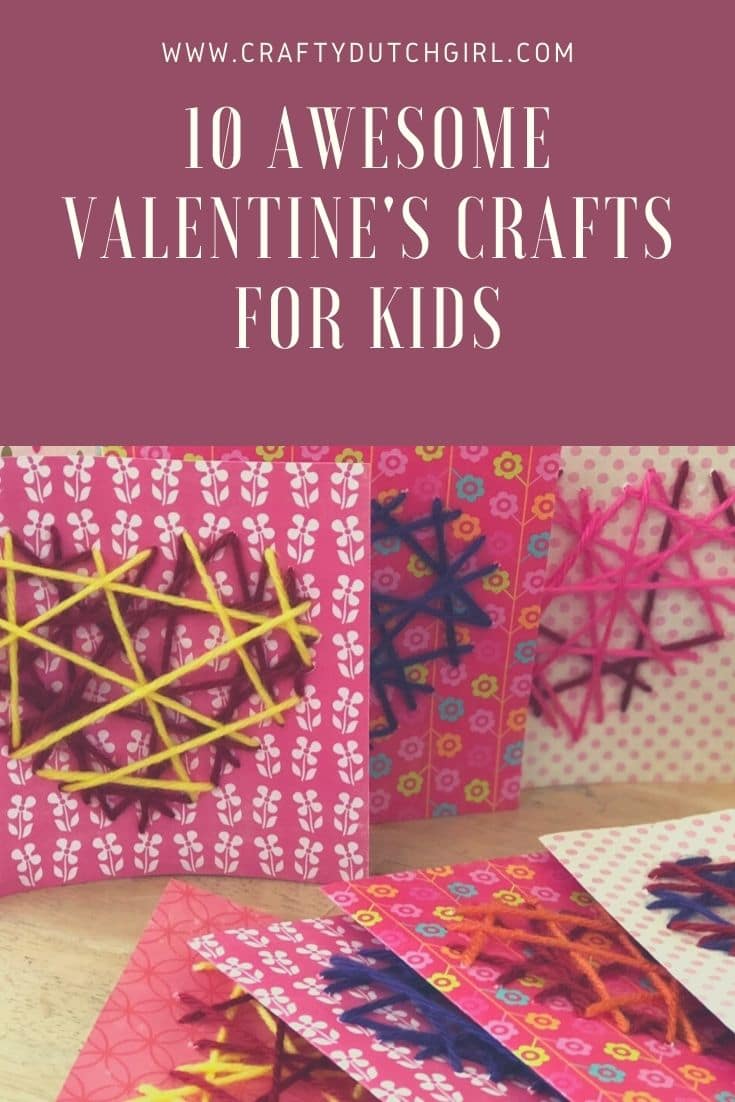
Yarn Heart Cards
Age 6 and up
Scrapbook paper
Needle
Yarn
Tape
Heart Template
Cut 5×10 inch cards out of Scrapbook paper. Fold the card in half. Poke holes 1/2 inch apart around the heart template on the front of the card. Use yarn to sew from one to the other hole of the heart. Tape the beginning and the end of the yarn on the inside of the card. Write something sweet on the inside of the card.
Crayon hearts
Age 3 and up plus adult supervision

Materials
Crayons (now those little stumps are coming in use)
Oven
Heart shape silicon mold ( I got mine at Walmart)
Cardstock
Glue dots
Ribbons
Peel the paper off the colors of crayons. Preheat the oven to 250 F. Arrange the stumps in the heart molds. Bake for about 10-15 minutes. Keep checking between 10-15. Just when you see the crayons are melted, take the mold carefully out of the oven (the crayons are liquid). Let cool completely!
The great part of using silicone, is that you can push the bottoms up, to remove your heart shape crayons. Make small cards out of cardstock and attach the heart shape crayon on the top with a glue dot. The card can be decorated, Don’t forget your name! Make a nice bow with a ribbon around the card and crayon heart!
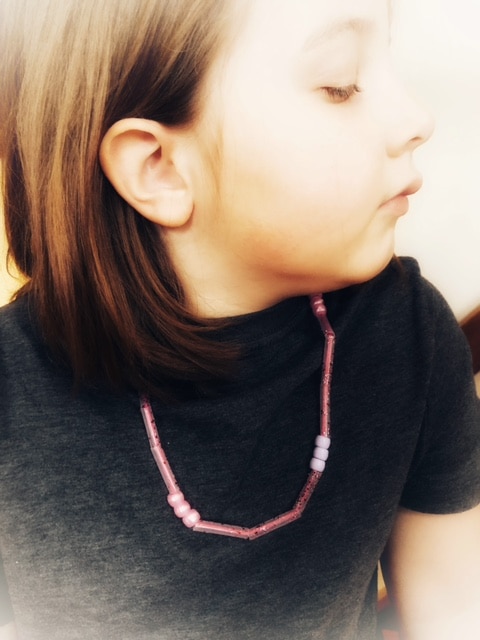
Heart Necklace
Age 3 and up
Materials
String or yarn
colorful straws
scissors
plastic needle form kids.
card stock or scrap book paper
optional markers.
Measure a piece of yarn, so it fits easily over a child’s head. Cut the straws in pieces between 1/2 and 1 inch big. Cut little hearts out of card stock or scrap book paper. Poke holes on top of or in the middle of the hearts. The kids can string the pieces of straws and hearts onto their necklaces. Make a knot at the end. A small piece of straw can be knotted at the end of the necklace, so it’ll be easier to string the rest on without falling of the string.
In the picture above you see colorful beads instead of hearts. Just use whatever you have and your child likes to do.
Heart Envelopes
Age 4 and up
Materials
Cardstock or scrapbook paper
Scissors
Heart template
Anything for decorations (markers, stickers etc)
Cut out a template about 5 by 5 inches (or bigger if you like to put something bigger inside). You can use a template to make more heart shaped envelopes on different colors of scrapbook paper. Fold the side of the heart to the center. Fold the bottom to the center. The top will be the flap of the envelope. You can fold that one last after decorating and putting something inside the envelope.
Thank you for checking these Valentine’s Crafts for kids out. I hope you liked them.
For a super fun and relaxing Valentine’s Day Home Spa for the whole family, check this out!
HAPPY VALENTINE’S DAY!!!!

Hello everyone,
Welcome to my Crafty Dutch Girl blog! Grab a cup of “koffie” and browse through fun blog posts about our Dutch family expat life in the USA, Dutch history, Dutch recipes, Dutch things to do in the USA and all kinds of crafts and activities. Don’t forget to connect with me for new ideas! “Groetjes en tot ziens”.