
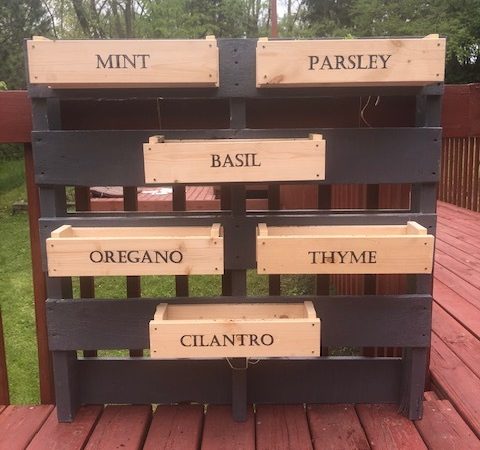
It is May and my salads are calling for fresh herbs. Please follow me on my journey to make this DIY Herb Box for the deck and it was under $40. This is one of my DIY projects during COVID-19. If you’d like to know what I made during this time, click here.
Crafty Dutch Girl is reader-supported. When you buy through links on our site, we may earn an affiliate commission. Learn more.
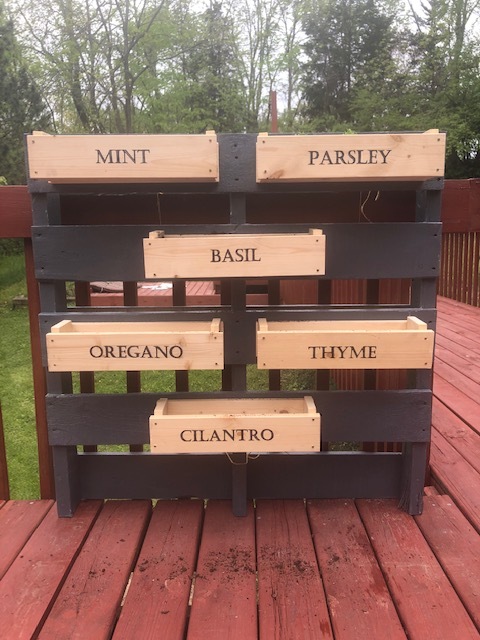
I’ve found these great pictures on Pinterest. I thought this would be great to have on our deck, so I made a combo of these 2 herb boxes!


I just love the idea I can reuse/recycle and I can have my herbs close to the kitchen, instead of going into the vegetable garden.
The materials
- A friend gave me a wooden pallet. It wasn’t in good shape. One piece was broken and the left over pieces were still there. The wood was pretty rough, but not rotted.
- Sand paper, hammer and crowbar (optional)
- Paint, paint brush, sealer
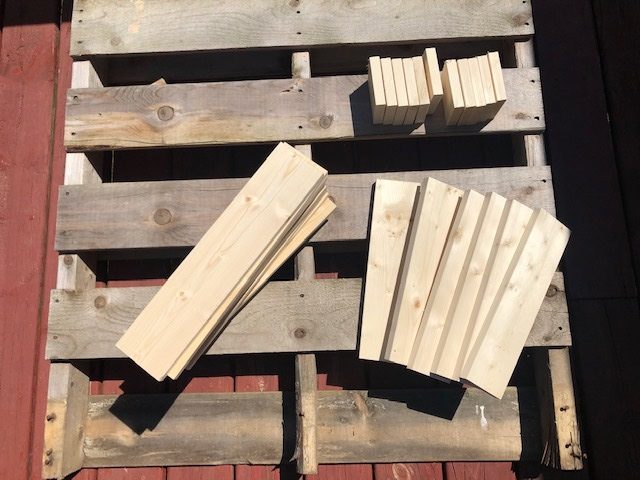
- It depends on the size of the wooden pallet planks and how wide you want them to be. I got 12 pieces of 4x4x1 inch, 12 pieces of 16x4x1 and 6 pieces of 14x4x1. This was for 6 boxes.
- Screws and a drill. I got Trim Head screws, 8×1-1/4. They probably could’ve been a little longer and a different head. Somehow my screws split the wood. Could’ve been the wrong wood too. I just trusted the people at the lumber…(note: later I discovered I had the wrong screws. Nails or deck screws would’ve been better)
- Printer, paper, black marker and pencil(s).
How to do it!!!
Step 1:
As I said before, my pallet was not in good shape. It is funny, because now, when I drive around town, I see pallets everywhere! Maybe you can ask local shops if you can have (or buy)a pallet for your project.
I started to remove the bad parts off with a crowbar and hammer the nails back into the pallet. You can add missing planks, but I decided not to do that, because it was the bottom one only for me. I hope it does not look bad:)
Step 2:
I sanded the pallet down. Especially the edges and corners, but some of the surfaces were pretty rough too.
Step 3:
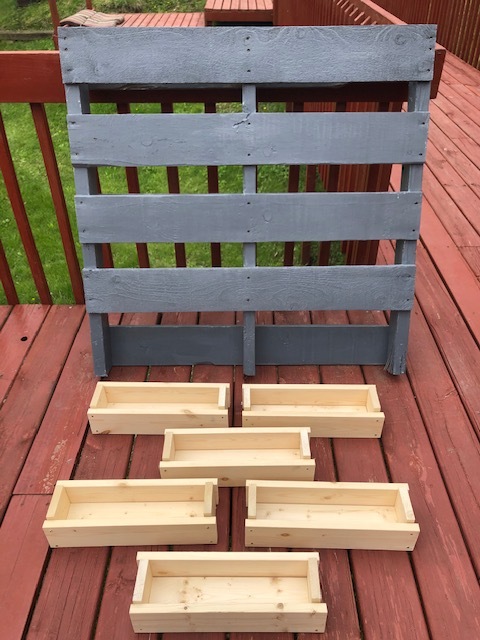
Then, I used some left over gray paint from a previous project, where I used this Chalked paint in Aged Gray for stenciling my bathroom tile floor. I just added almost a full bottle of acrylic paint to it, to make it a beautiful dark gray shade. If you want a different color, here you can find some great ones in interior and exterior use.
Step 4:
With an electric drill (I started manually, but that changed quickly:) to put the 6 boxes together.
Because I don’t have a table saw yet, I asked the lumber company to make the pieces for me with the right measurements. We got the pieces back and recognized immediately that the 4×4 squares were no squares. I just put them together anyway and it added some creativity to it…don’t you think?
Another thing that happened was, that the wood started to crack when I put the boxes together. Another idea, which of course came up after I put them all together, is using metal brackets with smaller screws. Like the ones. Or going fancy like these. Adding also wood glue.
Step 5:
This was my fun part of this project. I loved it, because it was easy and I didn’t have to use expensive letter stickers.
Use your computer which is connected to a printer. Go to a word doc (or other place where you can use different fonts) and type all the herb names in your favorite font. Use landscape, so the words can be made bigger too.
Print out the words (no mirroring needed). Cut the words out and turn the paper around. Use a gray pencil to go over the letters. Turn the paper back around, so you can see the word. Tape the paper in the middle of the front of a box.
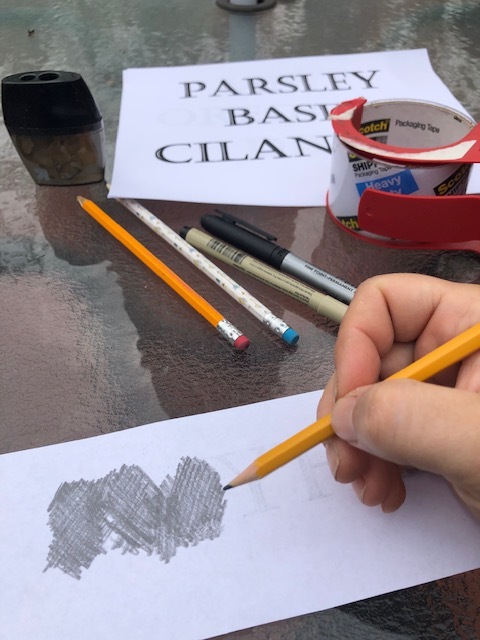
Use a pen or sharp pencil and trace the outside of the word.

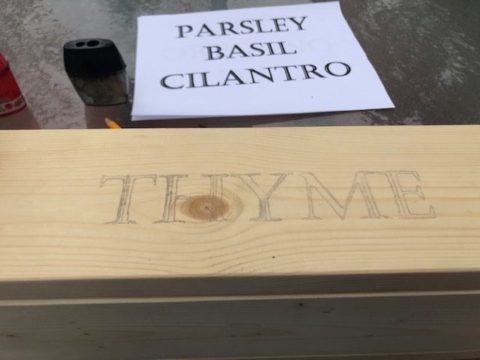
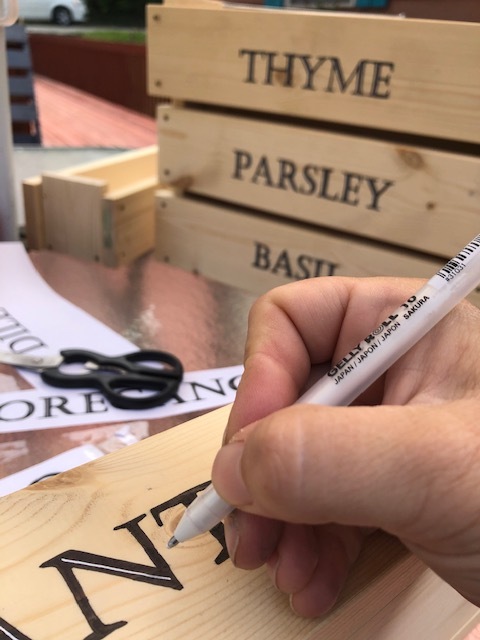
Take the paper off the box and use a black Sharpie to color in the letters. I even used a white pen to make the white line in the middle, but that didn’t last that long. After I did the next step, the letters became totally black again. It looked good for a little while;).
Step 6:
Brush water based Polycrylic on both the painted pallet and the boxes. Be careful when you go over the letters.
Let it dry and do another coat.
Step 7:
Now comes the tricky part. Again you can use brackets, but I just used the screws I had left, to attach the boxes to the pallet. Then I attached the pallet to the frame of our deck.
Step 8:
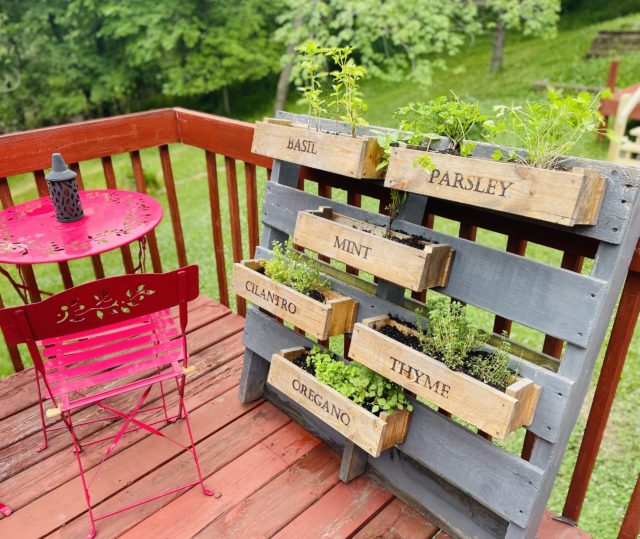
LAST BUT NOT LEAST: Add potting soil and herb plants to your boxes. I had a few herbs , but most of them died with the last frost. The parsley is STRONG!!!! I’m still waiting for a trip to the store to get some real herbs to put in my new boxes. I’m so happy with the result!!!
Thanks for reading about this project. Please pin if you liked it!


Hello everyone,
Welcome to my Crafty Dutch Girl blog! Grab a cup of “koffie” and browse through fun blog posts about our Dutch family expat life in the USA, Dutch history, Dutch recipes, Dutch things to do in the USA and all kinds of crafts and activities. Don’t forget to connect with me for new ideas! “Groetjes en tot ziens”.