We are in the middle of our DIY House Projects. One of the 2 bathrooms is done and now we are in the middle of the master bedroom. It is so exciting and we learn a lot. Now I even know “How to print on Fabric”!! A new world opened up to me….
Crafty Dutch Girl is reader-supported. When you buy through links on our site, we may earn an affiliate commission. Learn more.
Wall decoration in style
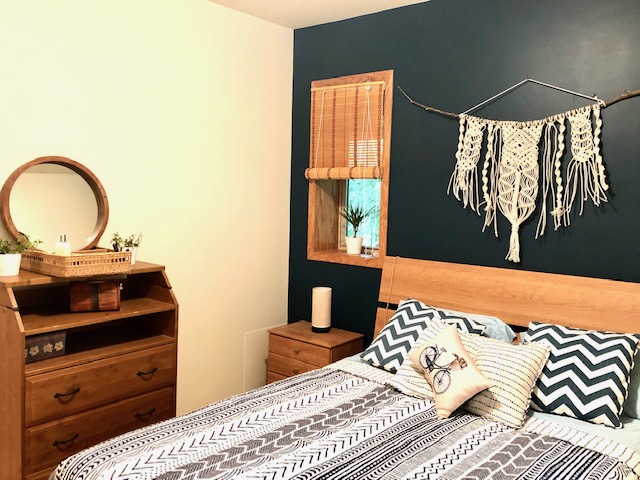
I had some decorations in mind for our new bedroom. The bedroom walls had a mint color. YUCK! I love dark blue, dark teal or blue-gray. I was afraid, our bedroom would get too dark with these colors. We just made the bold move to put white walls next to the blue ones and I think they turned out great!
I don’t have a particular style, but I like things Boho style and Country. I always see fun things on Pinterest, like this wall macrame thing, which I hope to make soon. Let’s see if all these decorations will look good together!
Reuse and recycle
The wall decoration I’m going to show you now, came suddenly on my to-do list. I found some embroidery hoops from my “Craft Cafe” in our storage (I closed this cafe in 2016). People donated so many things back then, from knitting needles, magazines to beads and these embroidery hoops.
I wasn’t sure about the color palette for the master bedroom, so a few months ago I started to make these cute embroidery cacti.
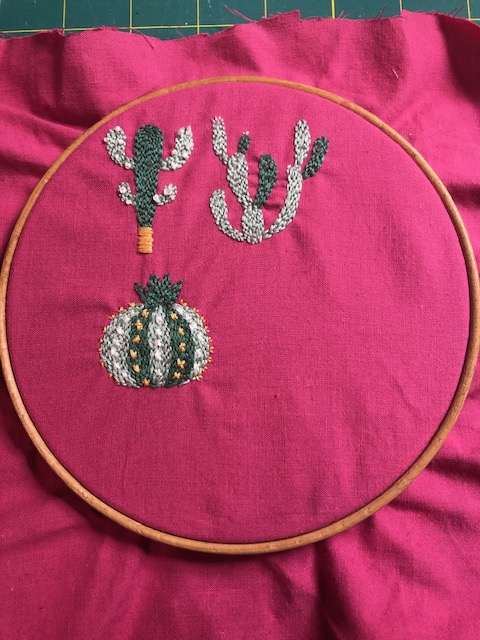
I came this far and it only took me 4 months ;( It was a lot of work and I didn’t even know if I was doing it right. So I left the hoop with tons of embroidery yarn in a bag.
Last week I was doing some research on how to make a wooden lounge chair for our reading nook in the master bedroom. You probably know by now, that the Dutch like to save money in all kinds of ways, but still have or make things in style and good quality. Well, here is another example (I’m going to make that chair very soon!). The pillows for this chair will be creamy white with a print on it, but how can get a print on that big piece of upholstery fabric?
I had to try this technique first, using Freezer paper and an ink jet printer, because it looks so easy! No way, this technique is going to work for a big piece of upholstery fabric, but I wanted to try it out anyway and see if it would work for the embroidery hoops.
Materials
Most of the materials I already had on hand (because we are trying to limit our visits to the stores during this COVID-19 pandemic). So, that was a plus! This didn’t solve the problem of how to print on a big piece of fabric to make a 25 x 25 x 5 inch pillow. But I found a trick in another post.
What you’ll need :
- a piece of fabric. I used a creamy white cotton kind of fabric.
- Freezer paper
- computer connected to a printer
- iron
- pencil
- ruler
- cutting mat and rotary cutter
- ink jet printer (not laser printer)
- Wooden embroidery hoops
- glue
How to do it?
Because I was in the mindset of using Vintage French prints for my pillows, I looked for similar prints for my embroidery hoops.
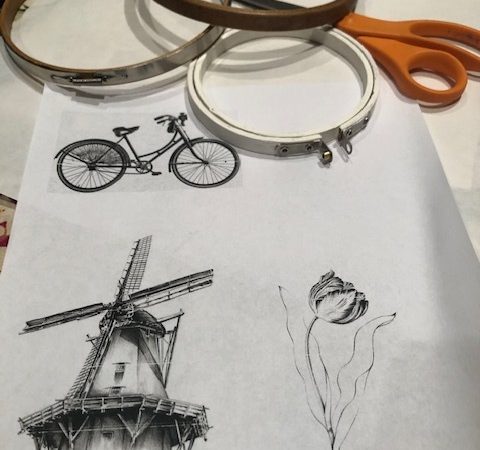
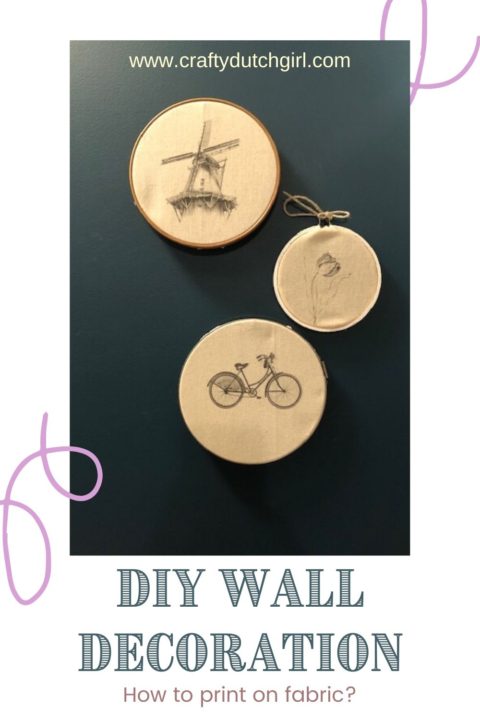
Then I decided to look for vintage Dutch prints. Sketches in black and white. A mill, a bike and a tulip.
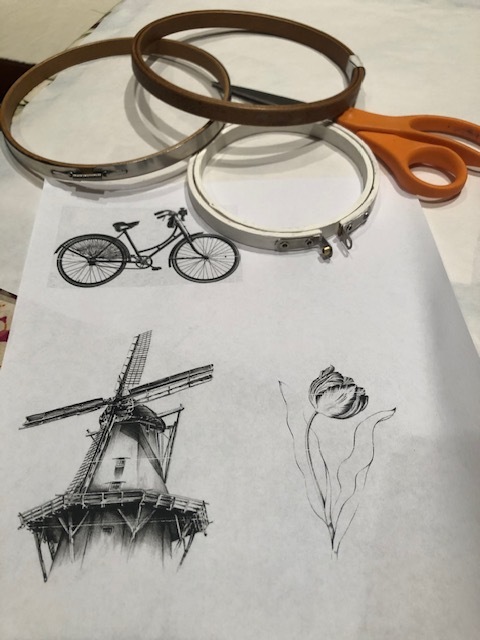
Step 1
I have 3 hoops, so I printed 3 sketches on normal printer paper to see if they would fit in the hoops. I resized the prints in a Word Document and removed the background in “Paint”. It was a little grey around the bike.
Step 2
The pieces of fabric were a little wrinkled, so I ironed them first. Then I ironed the Freezer paper on the fabric. The glossy/shiny side on the wrong side (if you have a wrong and right side on your piece of fabric).
Step 3
Use a piece of normal printer paper to make the Freezer paper/fabric combo the right size to go through the printer. It needs to be the same size as a normal piece of printer paper. To get the edges nice and crisp, use a rotary cutter and a cutting mat.
Step 4
So, which side has to go into the printer. The fabric side on top or the Freezer paper side on top? I tested this with a normal pieces of printer paper first. It was the fabric side on my printer. Test it out before you “do the real thing”.
Fingers crossed. There it goes! I was happily surprised it came out really nice!!!!

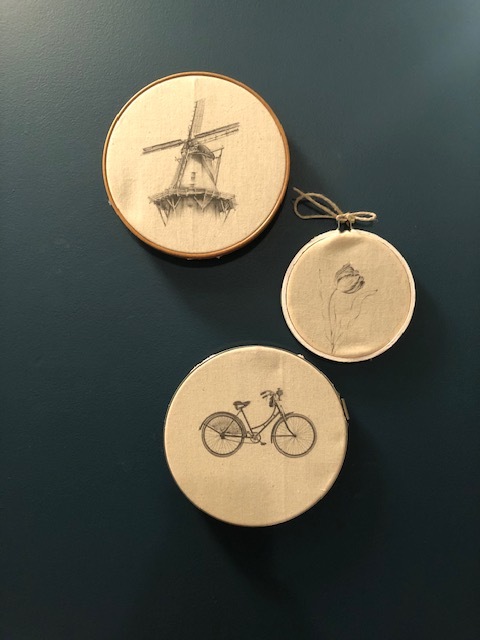
Step 5
Peel the Freezer Paper off and cut the fabric to size. I’m thinking of gluing the fabric onto the hoops. I cut the fabric a little too tight, so I might need to do that.
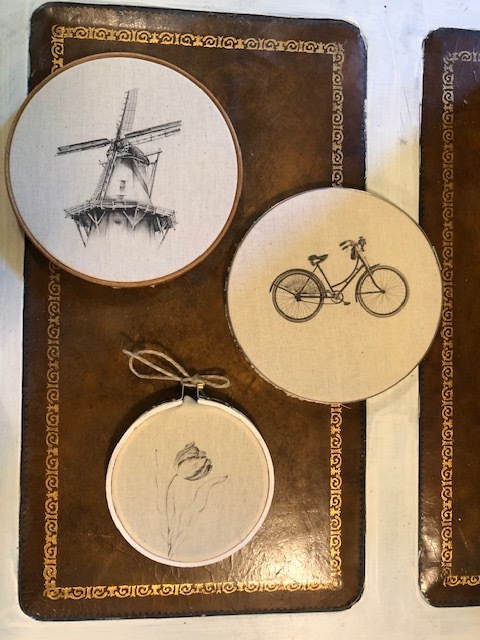
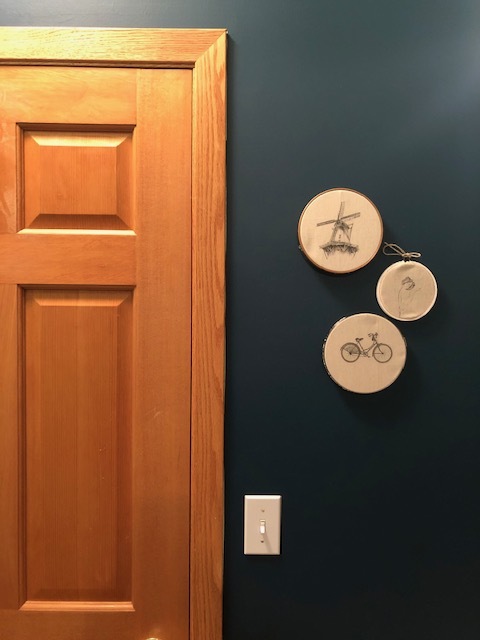
I’m sooo happy with the result! It looks already so good in our bare new bedroom!
I’d like to see your printed fabric!!
Enjoy!! Veel plezier!

Hello everyone,
Welcome to my Crafty Dutch Girl blog! Grab a cup of “koffie” and browse through fun blog posts about our Dutch family expat life in the USA, Dutch history, Dutch recipes, Dutch things to do in the USA and all kinds of crafts and activities. Don’t forget to connect with me for new ideas! “Groetjes en tot ziens”.